필자는 코딩 테스트를 준비하며 다양한 알고리즘 문제를
풀어보기 위해 C/C++ 언어를 선택하였다.
매번 어려움을 겪었던 개발환경 설정을 비로소 이번에야
글로 남겨 필요할떄 마다 꺼내볼 생각이다.
1. Visual Studio Code 설치
여러 개발환경에서 다양한 언어를 접했지만 아직도 필자는
VS-Code 가 가장 편한 IDE 인 것 같다.
많은 사람들이 사용하는 개발환경인 만큼 정보의 양도 많으니
딱히 취향이 있는것이 아니라면 사용하는것이 좋다는 판단이다.
Visual Studio Code - Code Editing. Redefined
Visual Studio Code is a code editor redefined and optimized for building and debugging modern web and cloud applications. Visual Studio Code is free and available on your favorite platform - Linux, macOS, and Windows.
code.visualstudio.com
2. Extention 항목에서 C++ 설치하기
아래의 그림에서 볼 수 있듯이 좌측의 도형 아이콘 Extension 항목에서
C++ 을 검색하면 Microsoft 사에서 지원하는 C/C++ 확장을 설치할 수 있다.
다만 내용에서도 보이듯 추가적으로 설치해야 할 과정들은 남아있다.
C++ is a compiled language meaning your program's source code must be translated (compiled) before it can be run on your computer.
C++은 프로그램의 소스 코드가 컴퓨터에서 실행되기 전, 컴파일 되어야 한다는 것을 의미하는 컴파일된 언어.
VS Code is first and foremost an editor, and relies on command-line tools to do much of the development workflow.
VS Code는 우선 편집기이며, 개발 워크플로우의 대부분을 명령줄 도구에 의존.
The C/C++ extension does not include a C++ compiler or debugger.
C/C++ 확장에는 C++ 컴파일러나 디버거가 포함되어 있지 않다.
You will need to install these tools or use those already installed on your computer.
도구를 설치하거나 컴퓨터에 이미 설치된 도구를 사용해야 한다.

3. C/C++ 컴파일러 gcc/g++ 설치를 위한 MinGW 설치하기
아래의 SOURCEFORGE 사이트 링크를 통해 MinGW를 설치해보자.
Download Latest Version 버튼을 클릭하면 다운로드가 진행된다.
MinGW - Minimalist GNU for Windows - Browse Files at SourceForge.net
Our team of highly trained cybersecurity professionals provides expertise in compliance, tool assessments, threat hunting, incident response and more. Critical Start is leading the way in Managed Detection and Response (MDR) services. With a unique approac
sourceforge.net
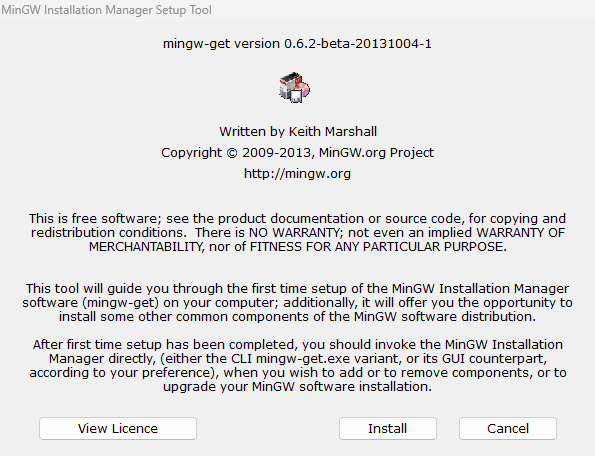
다음의 그림과 같이 실행할 수 있는 파일을 다운로드 했다면 성공이다.
Install 버튼을 클릭한다.
Continue 버튼을 클릭한다.

다음 그림과 같다면 정상적으로 설치가 되고 있는 모습이다.
설치가 끝났다면 Continue 버튼을 클릭한다.

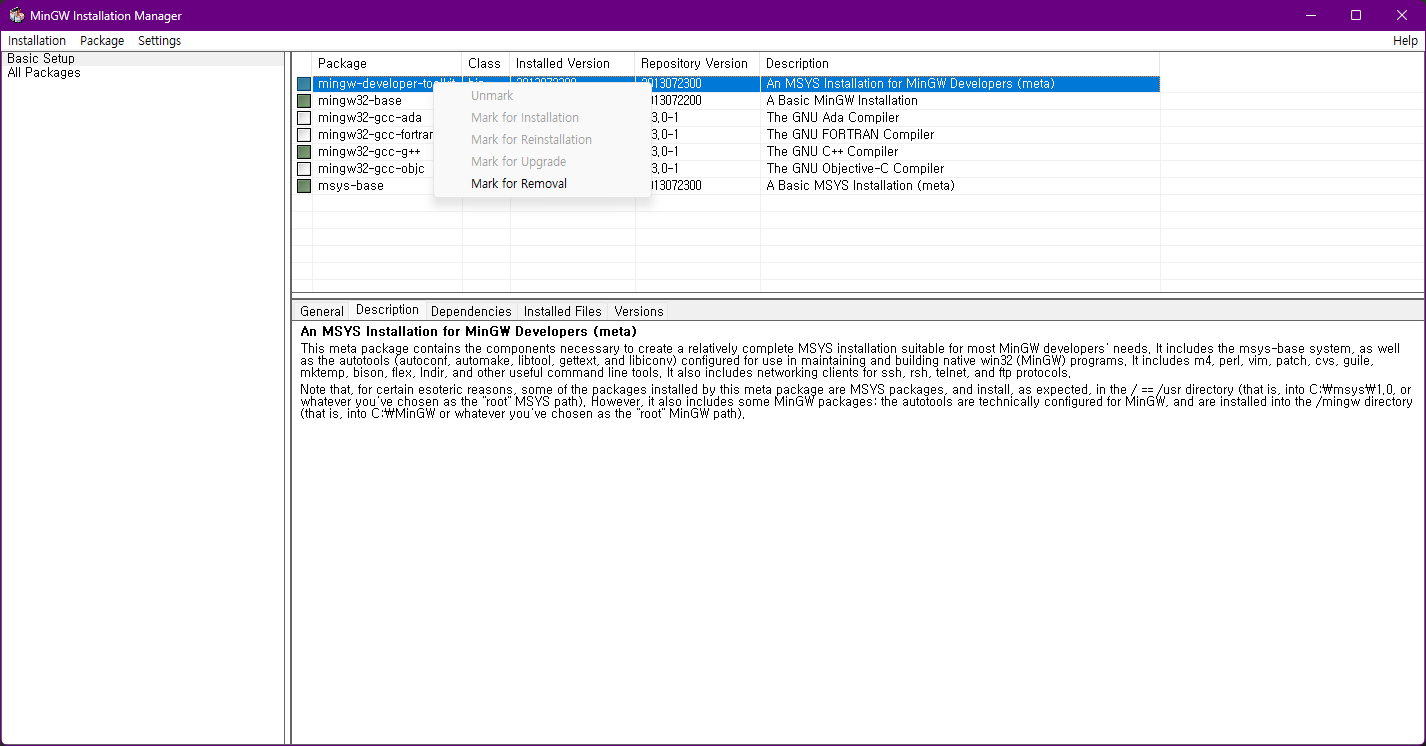
필자는 이미 설치를 완료한 상황이지만,
설치를 위해 다음과 같이 초록색으로 마크된 네개의 항목에 대해
우클릭 => Mark for Installation을 클릭한다.
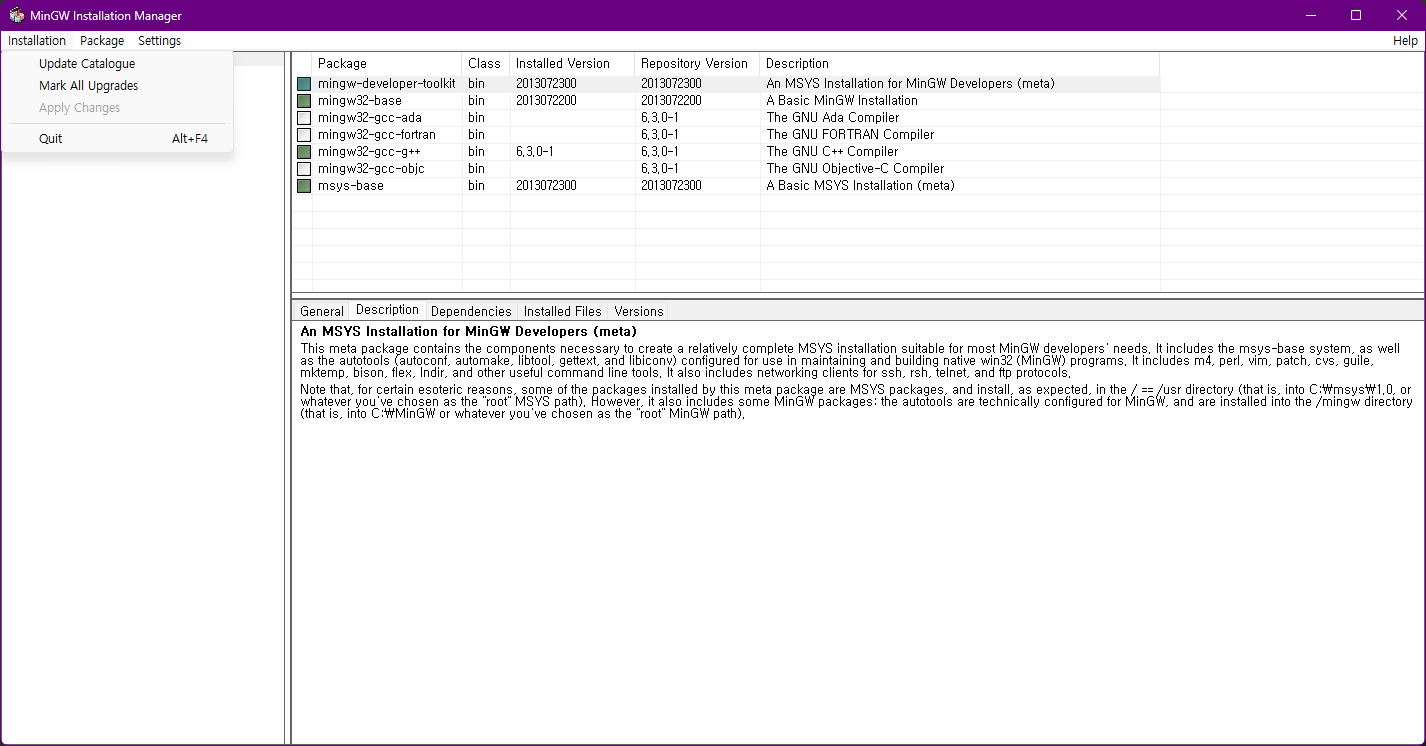
이후, 좌상단의 Installation에서 Apply Changes를 클릭하고,
설치를 위해 나타나는 창에서 Apply 버튼을 클릭해주면 된다.
4. 시스템 환경 변수 설정
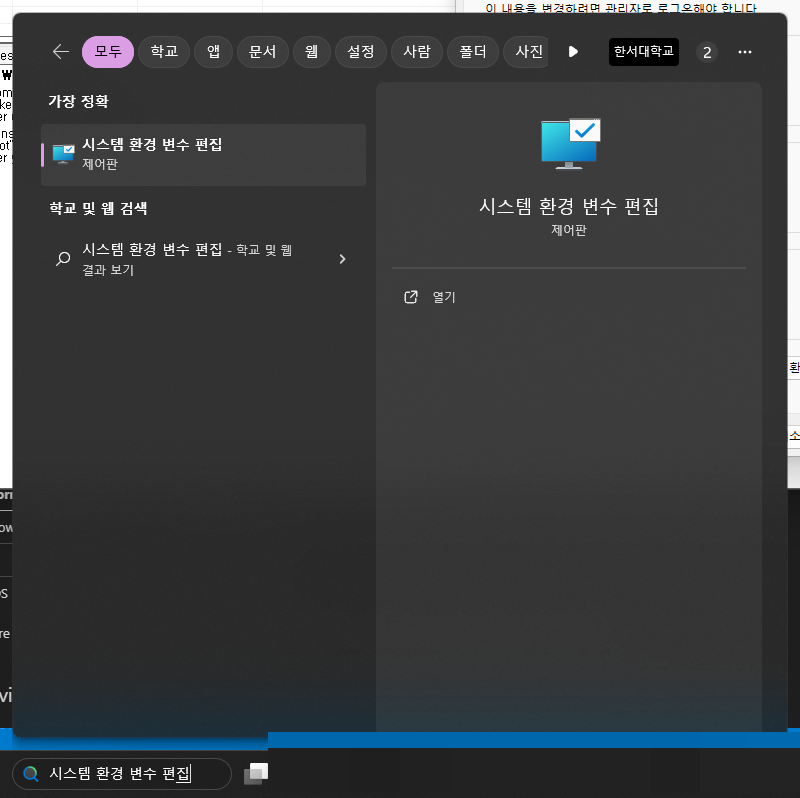
다음 그림과 같이 시스템 환경 변수 편집의 문구를 입력하면
시스템 속성이 나타나게 된다.
시스템 속성의 하단에 위치한 환경 변수를 클릭해준다.

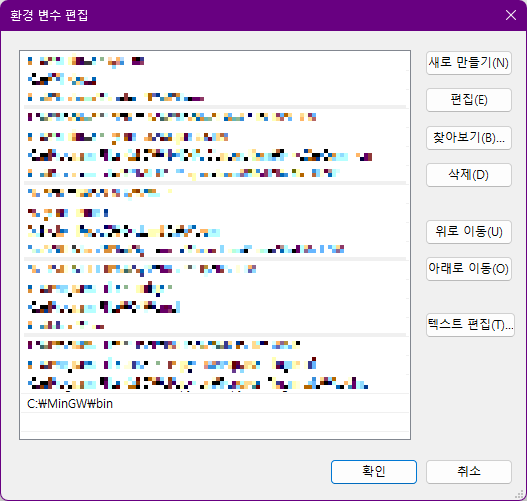
다음과 같이 환경 변수 목록이 나열되어있다.
우리는 Path 변수를 클릭하고 편집 버튼을 누른다.

새로 만들기 버튼을 눌러 다음의 절차를 추가해준다.

다음 그림과 같이 입력하여 최 하단에 경로 설정이 되었는지 확인해준다.
5. gcc/g++ 프롬프트로 버전 확인하기
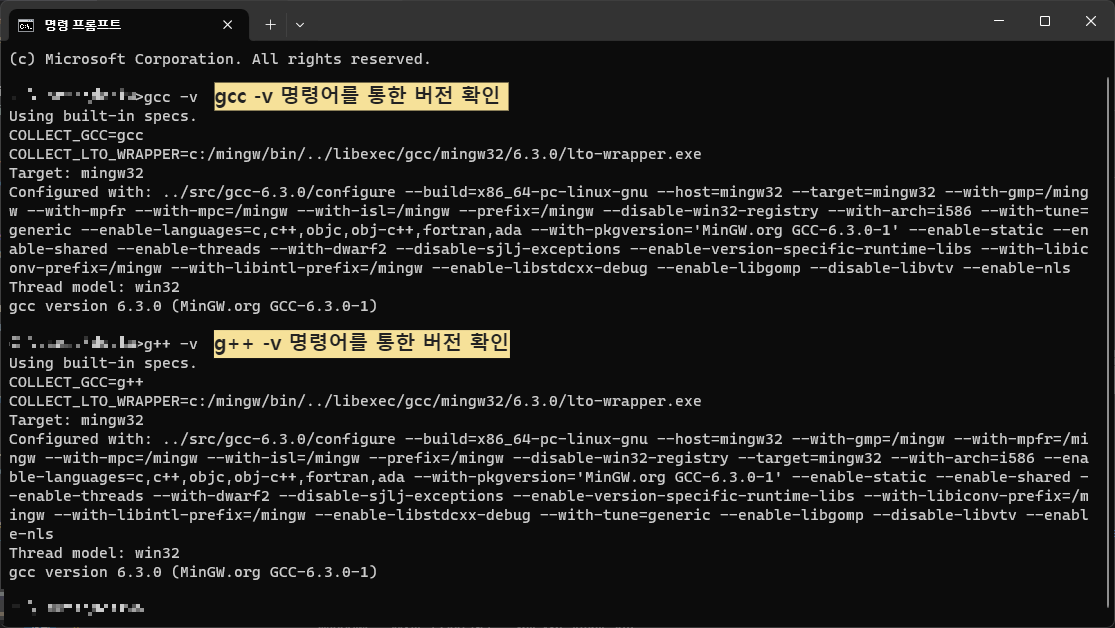
다음 그림과 같이 명령 프롬프트를 실행한다.

다음 그림과 같이 각각의 명령어를 통해 버전을 확인해준다.
그림과 같이 각각의 명령어마다 버전이 뜬다면 정상적으로 설정 되었다.
VS-Code 간단한 예제 코드 작성 및 설정
마지막 단계로 VS-Code에서 간단한 예제를 작성해보자.
필자는 <stdio.h> 헤더를 사용해 printf 구절로 출력을 확인해보았다.
당연히 바로 실행되지는 않는다.
launch.json과 tasks.json에 오류가 있다며 설정을 필요로 한다고 나타난다.
launch.json
다음의 내용을 그대로 복사 붙여넣기 하여 수정해준다.
{
  "version": "0.2.0",
  "configurations": [
    {
      "name": "C++ Launch",
      "type": "cppdbg",
      "request": "launch",
      "program": "${workspaceFolder}/your_executable_name.exe",
      "args": [],
      "stopAtEntry": false,
      "cwd": "${workspaceFolder}",
      "environment": [],
      "externalConsole": false,
      "MIMode": "gdb",
      "setupCommands": [
        {
          "description": "Enable pretty-printing for gdb",
          "text": "-enable-pretty-printing",
          "ignoreFailures": true
        }
      ],
      "preLaunchTask": "save and compile for C++"
    }
  ]
}
tasks.json
다음의 내용을 그대로 복사 붙여넣기 하여 수정해준다.
{
  "version": "2.0.0",
  "tasks": [
    {
      "label": "save and compile for C++",
      "command": "g++",
      "args": [
        "${file}",
        "-o",
        "${fileDirname}/${fileBasenameNoExtension}"
      ],
      "group": "build",
      "problemMatcher": {
        "fileLocation": [
          "relative",
          "${workspaceRoot}"
        ],
        "pattern": {
          "regexp": "^(.*):(\\d+):(\\d+):\\s+(warning error):\\s+(.*)$",
          "file": 1,
          "line": 2,
          "column": 3,
          "severity": 4,
          "message": 5
        }
      }
    },
    {
      "label": "save and compile for C",
      "command": "gcc",
      "args": [
        "${file}",
        "-o",
        "${fileDirname}/${fileBasenameNoExtension}"
      ],
      "group": "build",
      "problemMatcher": {
        "fileLocation": [
          "relative",
          "${workspaceRoot}"
        ],
        "pattern": {
          "regexp": "^(.*):(\\d+):(\\d+):\\s+(warning error):\\s+(.*)$",
          "file": 1,
          "line": 2,
          "column": 3,
          "severity": 4,
          "message": 5
        }
      }
    },
    {
      "label": "execute",
      "command": "cmd",
      "group": "test",
      "args": [
        "/C",
        "${fileDirname}\\${fileBasenameNoExtension}"
      ]
    },
    {
      "type": "cppbuild",
      "label": "C/C++: gcc.exe 활성 파일 빌드",
      "command": "C:\\MinGW\\bin\\gcc.exe",
      "args": [
        "-fdiagnostics-color=always",
        "-g",
        "${file}",
        "-o",
        "${fileDirname}\\${fileBasenameNoExtension}.exe"
      ],
      "options": {
        "cwd": "C:\\MinGW\\bin"
      },
      "problemMatcher": [
        "$gcc"
      ],
      "group": {
        "kind": "build",
        "isDefault": true
      },
      "detail": "디버거에서 생성된 작업입니다."
    }
  ]
}